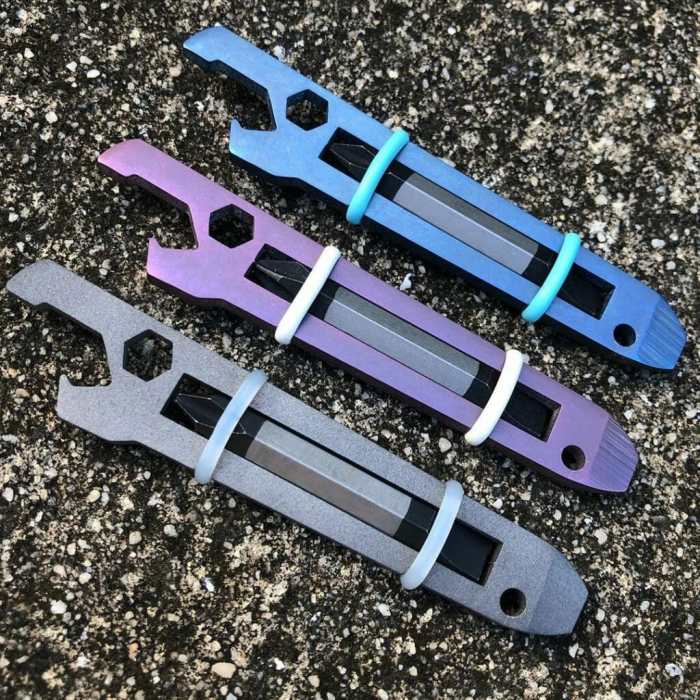
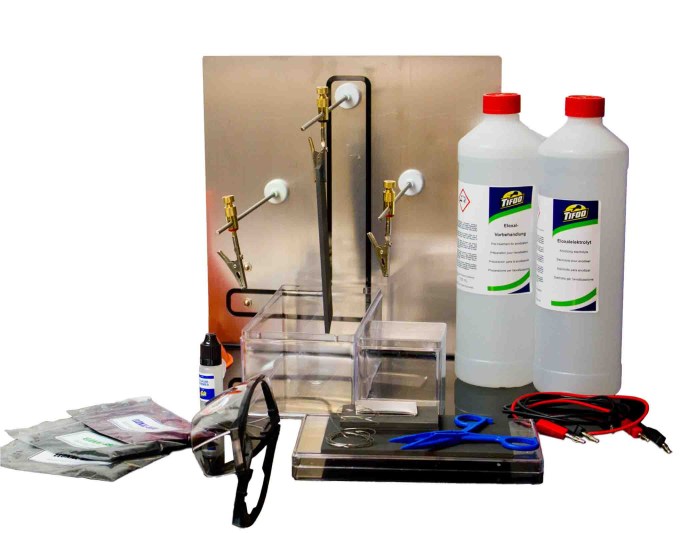
DIY anodizing, the process of creating a durable and aesthetically pleasing oxide layer on metal surfaces, has gained popularity among makers and hobbyists. This technique allows you to transform ordinary metal objects into eye-catching creations, adding a touch of elegance and protection. Whether you’re a seasoned metalworker or a curious beginner, this comprehensive guide will equip you with the knowledge and skills needed to embark on your own anodizing adventures.
Anodizing involves using an electrolytic process to create a protective oxide layer on the surface of certain metals, most commonly aluminum. This layer enhances the metal’s resistance to corrosion, abrasion, and wear, while also offering a canvas for vibrant colors. The process itself is surprisingly straightforward, involving a few key steps and readily available materials.
What is DIY Anodizing?

DIY anodizing is a process that allows you to create a durable, colorful, and protective coating on metal surfaces. It’s a popular technique for enhancing the appearance and functionality of various metal objects, especially for those who enjoy crafting and working with metals.
Anodizing is an electrochemical process that converts the metal surface into a protective oxide layer. In simpler terms, it’s like giving the metal a “superficial sunburn” that strengthens and alters its appearance.
Common Metals That Can Be Anodized
Anodizing is primarily used on aluminum, but other metals can also be treated, including:
- Titanium
- Magnesium
- Niobium
- Tantalum
- Zinc
- Some alloys, such as stainless steel
Benefits of Anodizing for DIY Projects
Anodizing offers numerous benefits for DIY enthusiasts:
- Corrosion Resistance: The oxide layer created during anodizing acts as a barrier against corrosion, protecting the metal from rust and other forms of deterioration. This is particularly beneficial for outdoor projects or items exposed to harsh environments.
- Increased Durability: The anodizing process hardens the metal surface, making it more resistant to scratches, abrasion, and wear. This increased durability extends the lifespan of the object and makes it more suitable for demanding applications.
- Aesthetic Enhancement: Anodizing can add a wide range of colors to metal surfaces, from vibrant hues to subtle shades. This allows for customization and personalization of projects, creating unique and visually appealing finishes.
- Improved Electrical Conductivity: Anodizing can improve the electrical conductivity of certain metals, making them suitable for applications where electrical performance is crucial.
- Cost-Effectiveness: Compared to other surface treatments, anodizing is relatively affordable and can be performed at home with readily available materials. This makes it a budget-friendly option for DIY projects.
Setting Up Your Anodizing Station: Diy Anodizing

Setting up a dedicated workspace for anodizing is essential for safety and efficiency. A well-organized station allows for a smooth anodizing process, minimizing the risk of accidents and ensuring consistent results.
Workspace Setup
A well-ventilated area is crucial for anodizing. This is because the process generates hydrogen gas, which is flammable and potentially explosive. A garage or outdoor workspace with good air circulation is ideal. You’ll need a sturdy table or workbench to accommodate the anodizing bath, power supply, and other equipment. It’s also recommended to have a dedicated sink for rinsing and cleaning parts.
Safety Precautions, Diy anodizing
Anodizing involves working with electricity and chemicals, so safety must be a top priority. Here are some essential precautions to take:
- Wear appropriate personal protective equipment (PPE) including gloves, eye protection, and a respirator when handling chemicals.
- Avoid contact with the electrolyte solution, as it can be corrosive and cause skin irritation.
- Ensure the workspace is well-ventilated to prevent the buildup of hydrogen gas.
- Never mix different types of electrolytes or acids, as this can create hazardous reactions.
- Keep a fire extinguisher readily available in case of an emergency.
- Always disconnect the power supply before handling parts or making any adjustments to the anodizing bath.
Setting Up the Anodizing Bath
The anodizing bath is the heart of the process. It’s where the metal part is submerged in the electrolyte solution and subjected to an electric current. Here’s how to set up your anodizing bath:
- Select a suitable container made of a non-reactive material like plastic or glass. The container should be large enough to fully immerse the part you intend to anodize.
- Fill the container with the appropriate electrolyte solution. The type of electrolyte will depend on the desired color and finish.
- Use a thermometer to monitor the electrolyte temperature, as it should be maintained within a specific range for optimal results.
Connecting the Power Supply and Electrodes
The power supply provides the electrical current necessary for the anodizing process. The electrodes act as conductors, transferring the current to the metal part and the electrolyte solution.
- Connect the positive terminal of the power supply to the anode (the metal part you are anodizing).
- Connect the negative terminal of the power supply to the cathode (a piece of metal that acts as a counter electrode).
- Ensure that the electrodes are fully immersed in the electrolyte solution and that they are not touching each other.
Embarking on your DIY anodizing journey is a rewarding experience that opens doors to a world of creative possibilities. From adding a splash of color to your projects to enhancing their durability, anodizing offers a versatile and engaging way to transform your metal creations. With a little patience and practice, you can master this technique and unlock the potential to personalize and protect your metalwork like never before.
DIY anodizing is a fun and rewarding project, allowing you to customize the look of your metal parts. While you’re working on your projects, it’s important to remember that certain chemicals can be hazardous. For example, some people experience side effects from using albuterol, such as tremors or headaches, which is why it’s crucial to be aware of potential risks.
albuterol side effects are generally mild and temporary, but it’s always best to consult with a doctor if you have any concerns. Back to anodizing, always work in a well-ventilated area and wear appropriate safety gear to protect yourself.
